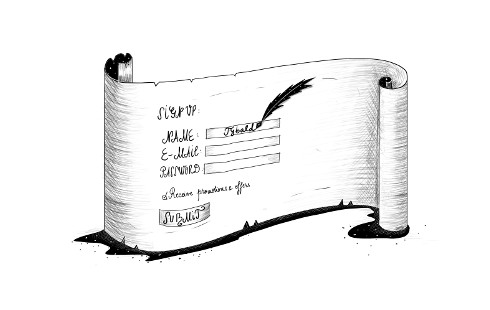
HTTP and Forms
What was often difficult for people to understand about the design was that there was nothing else beyond URLs, HTTP and HTML. There was no central computer ‘controlling’ the web, no single network on which these protocols worked, not even an organisation anywhere that ‘ran’ the Web. The Web was not a physical ‘thing’ that existed in a certain ‘place’. It was a ‘space’ in which information could exist.
The Hypertext Transfer Protocol, introduced in Chapter 13, is the mechanism through which data is requested and provided on the World Wide Web. This chapter describes the protocol in more detail and explains the way browser JavaScript has access to it.
The protocol
If you type eloquentjavascript.net/18_http.html in your browser’s address bar, the browser first looks up the address of the server associated with eloquentjavascript.net and tries to open a TCP connection to it on port 80, the default port for HTTP traffic. If the server exists and accepts the connection, the browser might send something like this:
GET /18_http.html HTTP/1.1
Host: eloquentjavascript.net
User-Agent: Your browser's name
Then the server responds, through that same connection.
HTTP/1.1 200 OK
Content-Length: 87320
Content-Type: text/html
Last-Modified: Fri, 13 Oct 2023 10:05:41 GMT

<!doctype html>
... the rest of the document
The browser takes the part of the response after the blank line, its body (not to be confused with the HTML <body> tag), and displays it as an HTML document.
The information sent by the client is called the request. It starts with this line:
GET /18_http.html HTTP/1.1
The first word is the method of the request. GET means that we want to get the specified resource. Other common methods are DELETE to delete a resource, PUT to create or replace it, and POST to send information to it. Note that the server is not obliged to carry out every request it gets. If you walk up to a random website and tell it to DELETE its main page, it’ll probably refuse.
The part after the method name is the path of the resource the request applies to. In the simplest case, a resource is simply a file on the server, but the protocol doesn’t require it to be. A resource may be anything that can be transferred as if it is a file. Many servers generate the responses they produce on the fly. For example, if you open https://github.com/marijnh, the server looks in its database for a user named “marijnh”, and if it finds one, it will generate a profile page for that user.
After the resource path, the first line of the request mentions HTTP/1.1 to indicate the version of the HTTP protocol it is using.
In practice, many sites use HTTP version 2, which supports the same concepts as version 1.1 but is a lot more complicated so that it can be faster. Browsers will automatically switch to the appropriate protocol version when talking to a given server, and the outcome of a request is the same regardless of which version is used. Because version 1.1 is more straightforward and easier to play around with, we’ll use that to illustrate the protocol.
The server’s response will start with a version as well, followed by the status of the response, first as a three-digit status code and then as a human-readable string.
HTTP/1.1 200 OK
Status codes starting with a 2 indicate that the request succeeded. Codes starting with 4 mean there was something wrong with the request. The most famous HTTP status code is probably 404, which means that the resource could not be found. Codes that start with 5 mean an error happened on the server and the request is not to blame.
The first line of a request or response may be followed by any number of headers. These are lines in the form name: value that specify extra information about the request or response. These headers were part of the example response:
Content-Length: 87320
Content-Type: text/html
Last-Modified: Fri, 13 Oct 2023 10:05:41 GMT
This tells us the size and type of the response document. In this case, it is an HTML document of 87,320 bytes. It also tells us when that document was last modified.
The client and server are free to decide what headers to include in their requests or responses. But some of them are necessary for things to work. For example, without a Content-Type header in the response, the browser won’t know how to display the document.
After the headers, both requests and responses may include a blank line followed by a body, which contains the actual document being sent. GET and DELETE requests don’t send along any data, but PUT and POST requests do. Some response types, such as error responses, also don’t require a body.
Browsers and HTTP
As we saw, a browser will make a request when we enter a URL in its address bar. When the resulting HTML page references other files, such as images and JavaScript files, it will retrieve those as well.
A moderately complicated website can easily include anywhere from 10 to 200 resources. To be able to fetch those quickly, browsers will make several GET requests simultaneously, rather than waiting for the responses one at a time.
HTML pages may include forms, which allow the user to fill out information and send it to the server. This is an example of a form:
<form method="GET" action="example/message.html">
  <p>Name: <input type="text" name="name"></p>
  <p>Message:<br><textarea name="message"></textarea></p>
  <p><button type="submit">Send</button></p>
</form>
This code describes a form with two fields: a small one asking for a name and a larger one to write a message in. When you click the Send button, the form is submitted, meaning that the content of its field is packed into an HTTP request and the browser navigates to the result of that request.
When the <form> element’s method attribute is GET (or is omitted), the information in the form is added to the end of the action URL as a query string. The browser might make a request to this URL:
GET /example/message.html?name=Jean&message=Yes%3F HTTP/1.1
The question mark indicates the end of the path part of the URL and the start of the query. It is followed by pairs of names and values, corresponding to the name attribute on the form field elements and the content of those elements, respectively. An ampersand character (&) is used to separate the pairs.
The actual message encoded in the URL is “Yes?” but the question mark is replaced by a strange code. Some characters in query strings must be escaped. The question mark, represented as %3F, is one of those. There seems to be an unwritten rule that every format needs its own way of escaping characters. This one, called URL encoding, uses a percent sign followed by two hexadecimal (base 16) digits that encode the character code. In this case, 3F, which is 63 in decimal notation, is the code of a question mark character. JavaScript provides the encodeURIComponent and decodeURIComponent functions to encode and decode this format.
console.log(encodeURIComponent("Yes?"));
// → Yes%3F
console.log(decodeURIComponent("Yes%3F"));
// → Yes?
If we change the method attribute of the HTML form in the example we saw earlier to POST, the HTTP request made to submit the form will use the POST method and put the query string in the body of the request rather than adding it to the URL.
POST /example/message.html HTTP/1.1
Content-length: 24
Content-type: application/x-www-form-urlencoded

name=Jean&message=Yes%3F
GET requests should be used for requests that do not have side effects but simply ask for information. Requests that change something on the server, for example creating a new account or posting a message, should be expressed with other methods, such as POST. Client-side software such as a browser knows that it shouldn’t blindly make POST requests but will often implicitly make GET requests—to prefetch a resource it believes the user will soon need, for example.
We’ll come back to forms and how to interact with them from JavaScript later in the chapter.
Fetch
The interface through which browser JavaScript can make HTTP requests is called fetch.
fetch("example/data.txt").then(response => {
  console.log(response.status);
  // → 200
  console.log(response.headers.get("Content-Type"));
  // → text/plain
});
Calling fetch returns a promise that resolves to a Response object holding information about the server’s response, such as its status code and its headers. The headers are wrapped in a Map-like object that treats its keys (the header names) as case insensitive because header names are not supposed to be case sensitive. This means headers. and headers. will return the same value.
Note that the promise returned by fetch resolves successfully even if the server responded with an error code. It can also be rejected if there is a network error or if the server to which that the request is addressed can’t be found.
The first argument to fetch is the URL that should be requested. When that URL doesn’t start with a protocol name (such as http:), it is treated as relative, which means it is interpreted relative to the current document. When it starts with a slash (/), it replaces the current path, which is the part after the server name. When it does not, the part of the current path up to and including its last slash character is put in front of the relative URL.
To get at the actual content of a response, you can use its text method. Because the initial promise is resolved as soon as the response’s headers have been received and because reading the response body might take a while longer, this again returns a promise.
fetch("example/data.txt")
  .then(resp => resp.text())
  .then(text => console.log(text));
// → This is the content of data.txt
A similar method, called json, returns a promise that resolves to the value you get when parsing the body as JSON or rejects if it’s not valid JSON.
By default, fetch uses the GET method to make its request and does not include a request body. You can configure it differently by passing an object with extra options as a second argument. For example, this request tries to delete example/data.txt:
fetch("example/data.txt", {method: "DELETE"}).then(resp => {
  console.log(resp.status);
  // → 405
});
The 405 status code means “method not allowed”, an HTTP server’s way of saying “I’m afraid I can’t do that”.
To add a request body for a PUT or POST request, you can include a body option. To set headers, there’s the headers option. For example, this request includes a Range header, which instructs the server to return only part of a document.
fetch("example/data.txt", {headers: {Range: "bytes=8-19"}})
  .then(resp => resp.text())
  .then(console.log);
// → the content
The browser will automatically add some request headers, such as “Host” and those needed for the server to figure out the size of the body. But adding your own headers is often useful to include things such as authentication information or to tell the server which file format you’d like to receive.
HTTP sandboxing
Making HTTP requests in web page scripts once again raises concerns about security. The person who controls the script might not have the same interests as the person on whose computer it is running. More specifically, if I visit themafia.org, I do not want its scripts to be able to make a request to mybank.com, using identifying information from my browser, with instructions to transfer away all my money.
For this reason, browsers protect us by disallowing scripts to make HTTP requests to other domains (names such as themafia.org and mybank.com).
This can be an annoying problem when building systems that want to access several domains for legitimate reasons. Fortunately, servers can include a header like this in their response to explicitly indicate to the browser that it is okay for the request to come from another domain:
Access-Control-Allow-Origin: *
Appreciating HTTP
When building a system that requires communication between a JavaScript program running in the browser (client-side) and a program on a server (server-side), there are several different ways to model this communication.
A commonly used model is that of remote procedure calls. In this model, communication follows the patterns of normal function calls, except that the function is actually running on another machine. Calling it involves making a request to the server that includes the function’s name and arguments. The response to that request contains the returned value.
When thinking in terms of remote procedure calls, HTTP is just a vehicle for communication, and you will most likely write an abstraction layer that hides it entirely.
Another approach is to build your communication around the concept of resources and HTTP methods. Instead of a remote procedure called addUser, you use a PUT request to /users/larry. Instead of encoding that user’s properties in function arguments, you define a JSON document format (or use an existing format) that represents a user. The body of the PUT request to create a new resource is then such a document. A resource is fetched by making a GET request to the resource’s URL (for example, /users/larry), which again returns the document representing the resource.
This second approach makes it easier to use some of the features that HTTP provides, such as support for caching resources (keeping a copy of a resource on the client for fast access). The concepts used in HTTP, which are well designed, can provide a helpful set of principles to design your server interface around.
Security and HTTPS
Data traveling over the internet tends to follow a long, dangerous road. To get to its destination, it must hop through anything from coffee shop Wi-Fi hotspots to networks controlled by various companies and states. At any point along its route, it may be inspected or even modified.
If it is important that something remain secret, such as the password to your email account, or that it arrive at its destination unmodified, such as the account number you transfer money to via your bank’s website, plain HTTP is not good enough.
The secure HTTP protocol, used for URLs starting with https://, wraps HTTP traffic in a way that makes it harder to read and tamper with. Before exchanging data, the client verifies that the server is who it claims to be by asking it to prove that it has a cryptographic certificate issued by a certificate authority that the browser recognizes. Next, all data going over the connection is encrypted in a way that should prevent eavesdropping and tampering.
Thus, when it works right, HTTPS prevents other people from impersonating the website you are trying to talk to and from snooping on your communication. It’s not perfect, and there have been various incidents where HTTPS failed because of forged or stolen certificates and broken software, but it is a lot safer than plain HTTP.
Form fields
Forms were originally designed for the pre-JavaScript web to allow websites to send user-submitted information in an HTTP request. This design assumes that interaction with the server always happens by navigating to a new page.
However, the form elements are part of the DOM, like the rest of the page, and the DOM elements that represent form fields support a number of properties and events that are not present on other elements. These make it possible to inspect and control such input fields with JavaScript programs and do things such as adding new functionality to a form or using forms and fields as building blocks in a JavaScript application.
A web form consists of any number of input fields grouped in a <form> tag. HTML allows several different styles of fields, ranging from simple on/off checkboxes to drop-down menus and fields for text input. This book won’t try to comprehensively discuss all field types, but we’ll start with a rough overview.
A lot of field types use the <input> tag. This tag’s type attribute is used to select the field’s style. These are some commonly used <input> types:
text | A single-line text field |
password | Same as text but hides the text that is typed |
checkbox | An on/off switch |
color | A color |
date | A calendar date |
radio | (Part of) a multiple-choice field |
file | Allows the user to choose a file from their computer |
Form fields do not necessarily have to appear in a <form> tag. You can put them anywhere in a page. Such form-less fields cannot be submitted (only a form as a whole can), but when responding to input with JavaScript, we often don’t want to submit our fields normally anyway.
<p><input type="text" value="abc"> (text)</p>
<p><input type="password" value="abc"> (password)</p>
<p><input type="checkbox" checked> (checkbox)</p>
<p><input type="color" value="orange"> (color)</p>
<p><input type="date" value="2023-10-13"> (date)</p>
<p><input type="radio" value="A" name="choice">
   <input type="radio" value="B" name="choice" checked>
   <input type="radio" value="C" name="choice"> (radio)</p>
<p><input type="file"> (file)</p>
The JavaScript interface for such elements differs with the type of the element.
Multiline text fields have their own tag, <textarea>, mostly because using an attribute to specify a multiline starting value would be awkward. The <textarea> tag requires a matching </ closing tag and uses the text between those two, instead of the value attribute, as starting text.
<textarea>
one
two
three
</textarea>
Finally, the <select> tag is used to create a field that allows the user to select from a number of predefined options.
<select>
  <option>Pancakes</option>
  <option>Pudding</option>
  <option>Ice cream</option>
</select>
Whenever the value of a form field changes, it will fire a "change" event.
Focus
Unlike most elements in HTML documents, form fields can get keyboard focus. When clicked, moved to with tab, or activated in some other way, they become the currently active element and the recipient of keyboard input.
Thus, you can type into a text field only when it is focused. Other fields respond differently to keyboard events. For example, a <select> menu tries to move to the option that contains the text the user typed and responds to the arrow keys by moving its selection up and down.
We can control focus from JavaScript with the focus and blur methods. The first moves focus to the DOM element it is called on, and the second removes focus. The value in document. corresponds to the currently focused element.
<input type="text">
<script>
  document.querySelector("input").focus();
  console.log(document.activeElement.tagName);
  // → INPUT
  document.querySelector("input").blur();
  console.log(document.activeElement.tagName);
  // → BODY
</script>
For some pages, the user is expected to want to interact with a form field immediately. JavaScript can be used to focus this field when the document is loaded, but HTML also provides the autofocus attribute, which produces the same effect while letting the browser know what we are trying to achieve. This gives the browser the option to disable the behavior when it is not appropriate, such as when the user has put the focus on something else.
Browsers allow the user to move the focus through the document by pressing tab to move to the next focusable element, and shift-tab to move back to the previous element. By default, elements are visited in the order in which they appear in the document. It is possible to use the tabindex attribute to change this order. The following example document will let the focus jump from the text input to the OK button, rather than going through the help link first:
<input type="text" tabindex=1> <a href=".">(help)</a>
<button onclick="console.log('ok')" tabindex=2>OK</button>
By default, most types of HTML elements cannot be focused. You can add a tabindex attribute to any element to make it focusable. A tabindex of 0 makes an element focusable without affecting the focus order.
Disabled fields
All form fields can be disabled through their disabled attribute. It is an attribute that can be specified without value—the fact that it is present at all disables the element.
<button>I'm all right</button>
<button disabled>I'm out</button>
Disabled fields cannot be focused or changed, and browsers make them look gray and faded.
When a program is in the process of handling an action caused by some button or other control that might require communication with the server and thus take a while, it can be a good idea to disable the control until the action finishes. That way, when the user gets impatient and clicks it again, they don’t accidentally repeat their action.
The form as a whole
When a field is contained in a <form> element, its DOM element will have a form property linking back to the form’s DOM element. The <form> element, in turn, has a property called elements that contains an array-like collection of the fields inside it.
The name attribute of a form field determines the way its value will be identified when the form is submitted. It can also be used as a property name when accessing the form’s elements property, which acts both as an array-like object (accessible by number) and a map (accessible by name).
<form action="example/submit.html">
  Name: <input type="text" name="name"><br>
  Password: <input type="password" name="password"><br>
  <button type="submit">Log in</button>
</form>
<script>
  let form = document.querySelector("form");
  console.log(form.elements[1].type);
  // → password
  console.log(form.elements.password.type);
  // → password
  console.log(form.elements.name.form == form);
  // → true
</script>
A button with a type attribute of submit will, when pressed, cause the form to be submitted. Pressing enter when a form field is focused has the same effect.
Submitting a form normally means that the browser navigates to the page indicated by the form’s action attribute, using either a GET or a POST request. But before that happens, a "submit" event is fired. You can handle this event with JavaScript and prevent this default behavior by calling preventDefault on the event object.
<form>
  Value: <input type="text" name="value">
  <button type="submit">Save</button>
</form>
<script>
  let form = document.querySelector("form");
  form.addEventListener("submit", event => {
    console.log("Saving value", form.elements.value.value);
    event.preventDefault();
  });
</script>
Intercepting "submit" events in JavaScript has various uses. We can write code to verify that the values the user entered make sense and immediately show an error message instead of submitting the form. Or we can disable the regular way of submitting the form entirely, as in the example, and have our program handle the input, possibly using fetch to send it to a server without reloading the page.
Text fields
Fields created by <textarea> tags, or <input> tags with a type of text or password, share a common interface. Their DOM elements have a value property that holds their current content as a string value. Setting this property to another string changes the field’s content.
The selectionStart and selectionEnd properties of text fields give us information about the cursor and selection in the text. When nothing is selected, these two properties hold the same number, indicating the position of the cursor. For example, 0 indicates the start of the text, and 10 indicates the cursor is after the 10th character. When part of the field is selected, the two properties will differ, giving us the start and end of the selected text. Like value, these properties may also be written to.
Imagine you are writing an article about Khasekhemwy, last pharaoh of the Second Dynasty, but have some trouble spelling his name. The following code wires up a <textarea> tag with an event handler that, when you press F2, inserts the string “Khasekhemwy” for you.
<textarea></textarea>
<script>
  let textarea = document.querySelector("textarea");
  textarea.addEventListener("keydown", event => {
    if (event.key == "F2") {
      replaceSelection(textarea, "Khasekhemwy");
      event.preventDefault();
    }
  });
  function replaceSelection(field, word) {
    let from = field.selectionStart, to = field.selectionEnd;
    field.value = field.value.slice(0, from) + word +
                  field.value.slice(to);
    // Put the cursor after the word
    field.selectionStart = from + word.length;
    field.selectionEnd = from + word.length;
  }
</script>
The replaceSelection function replaces the currently selected part of a text field’s content with the given word and then moves the cursor after that word so that the user can continue typing.
The "change" event for a text field does not fire every time something is typed. Rather, it fires when the field loses focus after its content was changed. To respond immediately to changes in a text field, you should register a handler for the "input" event instead, which fires every time the user types a character, deletes text, or otherwise manipulates the field’s content.
The following example shows a text field and a counter displaying the current length of the text in the field:
<input type="text"> length: <span id="length">0</span>
<script>
  let text = document.querySelector("input");
  let output = document.querySelector("#length");
  text.addEventListener("input", () => {
    output.textContent = text.value.length;
  });
</script>
Checkboxes and radio buttons
A checkbox field is a binary toggle. Its value can be extracted or changed through its checked property, which holds a Boolean value.
<label>
  <input type="checkbox" id="purple"> Make this page purple
</label>
<script>
  let checkbox = document.querySelector("#purple");
  checkbox.addEventListener("change", () => {
    document.body.style.background =
      checkbox.checked ? "mediumpurple" : "";
  });
</script>
The <label> tag associates a piece of document with an input field. Clicking anywhere on the label will activate the field, which focuses it and toggles its value when it is a checkbox or radio button.
A radio button is similar to a checkbox, but it’s implicitly linked to other radio buttons with the same name attribute so that only one of them can be active at any time.
Color:
<label>
  <input type="radio" name="color" value="orange"> Orange
</label>
<label>
  <input type="radio" name="color" value="lightgreen"> Green
</label>
<label>
  <input type="radio" name="color" value="lightblue"> Blue
</label>
<script>
  let buttons = document.querySelectorAll("[name=color]");
  for (let button of Array.from(buttons)) {
    button.addEventListener("change", () => {
      document.body.style.background = button.value;
    });
  }
</script>
The square brackets in the CSS query given to querySelectorAll are used to match attributes. It selects elements whose name attribute is "color".
Select fields
Select fields are conceptually similar to radio buttons—they also allow the user to choose from a set of options. But where a radio button puts the layout of the options under our control, the appearance of a <select> tag is determined by the browser.
Select fields also have a variant more akin to a list of checkboxes rather than radio boxes. When given the multiple attribute, a <select> tag will allow the user to select any number of options, rather than just a single option. Whereas a regular select field is drawn as a drop-down control, which shows the inactive options only when you open it, a field with multiple enabled shows multiple options at the same time, allowing the user to enable or disable them individually.
Each <option> tag has a value. This value can be defined with a value attribute. When that is not given, the text inside the option will count as its value. The value property of a <select> element reflects the currently selected option. For a multiple field, though, this property doesn’t mean much, since it will give the value of only one of the currently selected options.
The <option> tags for a <select> field can be accessed as an array-like object through the field’s options property. Each option has a property called selected, which indicates whether that option is currently selected. The property can also be written to select or deselect an option.
This example extracts the selected values from a multiple select field and uses them to compose a binary number from individual bits. Hold ctrl (or command on a Mac) to select multiple options.
<select multiple>
  <option value="1">0001</option>
  <option value="2">0010</option>
  <option value="4">0100</option>
  <option value="8">1000</option>
</select> = <span id="output">0</span>
<script>
  let select = document.querySelector("select");
  let output = document.querySelector("#output");
  select.addEventListener("change", () => {
    let number = 0;
    for (let option of Array.from(select.options)) {
      if (option.selected) {
        number += Number(option.value);
      }
    }
    output.textContent = number;
  });
</script>
File fields
File fields were originally designed as a way to upload files from the user’s machine through a form. In modern browsers, they also provide a way to read such files from JavaScript programs. The field acts as a kind of gatekeeper. The script cannot simply start reading private files from the user’s computer, but if the user selects a file in such a field, the browser interprets that action to mean that the script may read the file.
A file field usually looks like a button labeled with something like “choose file” or “browse”, with information about the chosen file next to it.
<input type="file">
<script>
  let input = document.querySelector("input");
  input.addEventListener("change", () => {
    if (input.files.length > 0) {
      let file = input.files[0];
      console.log("You chose", file.name);
      if (file.type) console.log("It has type", file.type);
    }
  });
</script>
The files property of a file field element is an array-like object (once again, not a real array) containing the files chosen in the field. It is initially empty. The reason there isn’t simply a file property is that file fields also support a multiple attribute, which makes it possible to select multiple files at the same time.
The objects in files have properties such as name (the filename), size (the file’s size in bytes, which are chunks of 8 bits), and type (the media type of the file, such as text/plain or image/jpeg).
What it does not have is a property that contains the content of the file. Getting at that is a little more involved. Since reading a file from disk can take time, the interface is asynchronous to avoid freezing the window.
<input type="file" multiple>
<script>
  let input = document.querySelector("input");
  input.addEventListener("change", () => {
    for (let file of Array.from(input.files)) {
      let reader = new FileReader();
      reader.addEventListener("load", () => {
        console.log("File", file.name, "starts with",
                    reader.result.slice(0, 20));
      });
      reader.readAsText(file);
    }
  });
</script>
Reading a file is done by creating a FileReader object, registering a "load" event handler for it, and calling its readAsText method, giving it the file we want to read. Once loading finishes, the reader’s result property contains the file’s content.
FileReaders also fire an "error" event when reading the file fails for any reason. The error object itself will end up in the reader’s error property. This interface was designed before promises became part of the language. You could wrap it in a promise like this:
function readFileText(file) {
  return new Promise((resolve, reject) => {
    let reader = new FileReader();
    reader.addEventListener(
      "load", () => resolve(reader.result));
    reader.addEventListener(
      "error", () => reject(reader.error));
    reader.readAsText(file);
  });
}
Storing data client-side
Simple HTML pages with a bit of JavaScript can be a great format for “mini applications”—small helper programs that automate basic tasks. By connecting a few form fields with event handlers, you can do anything from converting between centimeters and inches to computing passwords from a master password and a website name.
When such an application needs to remember something between sessions, you cannot use JavaScript bindings—those are thrown away every time the page is closed. You could set up a server, connect it to the internet, and have your application store something there (we’ll see how to do that in Chapter 20). But that’s a lot of extra work and complexity. Sometimes it’s enough to just keep the data in the browser.
The localStorage object can be used to store data in a way that survives page reloads. This object allows you to file string values under names.
localStorage.setItem("username", "marijn");
console.log(localStorage.getItem("username"));
// → marijn
localStorage.removeItem("username");
A value in localStorage sticks around until it is overwritten or is removed with removeItem, or the user clears their local data.
Sites from different domains get different storage compartments. That means data stored in localStorage by a given website can, in principle, be read (and overwritten) only by scripts on that same site.
Browsers do enforce a limit on the size of the data a site can store in localStorage. That restriction, along with the fact that filling up people’s hard drives with junk is not really profitable, prevents the feature from eating up too much space.
The following code implements a crude note-taking application. It keeps a set of named notes and allows the user to edit notes and create new ones.
Notes: <select></select> <button>Add</button><br>
<textarea style="width: 100%"></textarea>

<script>
  let list = document.querySelector("select");
  let note = document.querySelector("textarea");

  let state;
  function setState(newState) {
    list.textContent = "";
    for (let name of Object.keys(newState.notes)) {
      let option = document.createElement("option");
      option.textContent = name;
      if (newState.selected == name) option.selected = true;
      list.appendChild(option);
    }
    note.value = newState.notes[newState.selected];

    localStorage.setItem("Notes", JSON.stringify(newState));
    state = newState;
  }
  setState(JSON.parse(localStorage.getItem("Notes")) ?? {
    notes: {"shopping list": "Carrots\nRaisins"},
    selected: "shopping list"
  });

  list.addEventListener("change", () => {
    setState({notes: state.notes, selected: list.value});
  });
  note.addEventListener("change", () => {
    let {selected} = state;
    setState({
      notes: {...state.notes, [selected]: note.value},
      selected
    });
  });
  document.querySelector("button")
    .addEventListener("click", () => {
      let name = prompt("Note name");
      if (name) setState({
        notes: {...state.notes, [name]: ""},
        selected: name
      });
    });
</script>
The script gets its starting state from the "Notes" value stored in localStorage or, if that’s missing, creates an example state that has only a shopping list in it. Reading a field that does not exist from localStorage will yield null. Passing null to JSON.parse will make it parse the string "null" and return null. Thus, the ?? operator can be used to provide a default value in a situation like this.
The setState method makes sure the DOM is showing a given state and stores the new state to localStorage. Event handlers call this function to move to a new state.
The ... syntax in the example is used to create a new object that is a clone of the old state.notes, but with one property added or overwritten. It uses spread syntax to first add the properties from the old object and then set a new property. The square brackets notation in the object literal is used to create a property whose name is based on some dynamic value.
There is another object, similar to localStorage, called sessionStorage. The difference between the two is that the content of sessionStorage is forgotten at the end of each session, which for most browsers means whenever the browser is closed.
Summary
In this chapter, we discussed how the HTTP protocol works. A client sends a request, which contains a method (usually GET) and a path that identifies a resource. The server then decides what to do with the request and responds with a status code and a response body. Both requests and responses may contain headers that provide additional information.
The interface through which browser JavaScript can make HTTP requests is called fetch. Making a request looks like this:
fetch("/18_http.html").then(r => r.text()).then(text => {
  console.log(`The page starts with ${text.slice(0, 15)}`);
});
Browsers make GET requests to fetch the resources needed to display a web page. A page may also contain forms, which allow information entered by the user to be sent as a request for a new page when the form is submitted.
HTML can represent various types of form fields, such as text fields, checkboxes, multiple-choice fields, and file pickers. Such fields can be inspected and manipulated with JavaScript. They fire the "change" event when changed, fire the "input" event when text is typed, and receive keyboard events when they have keyboard focus. Properties like value (for text and select fields) or checked (for checkboxes and radio buttons) are used to read or set the field’s content.
When a form is submitted, a "submit" event is fired on it. A JavaScript handler can call preventDefault on that event to disable the browser’s default behavior. Form field elements may also occur outside of a form tag.
When the user has selected a file from their local filesystem in a file picker field, the FileReader interface can be used to access the content of this file from a JavaScript program.
The localStorage and sessionStorage objects can be used to save information in a way that survives page reloads. The first object saves the data forever (or until the user decides to clear it), and the second saves it until the browser is closed.
Exercises
Content negotiation
One of the things HTTP can do is called content negotiation. The Accept request header is used to tell the server what type of document the client would like to get. Many servers ignore this header, but when a server knows of various ways to encode a resource, it can look at this header and send the one that the client prefers.
The URL https://eloquentjavascript.net/author is configured to respond with either plaintext, HTML, or JSON, depending on what the client asks for. These formats are identified by the standardized media types text/plain, text/html, and application/json.
Send requests to fetch all three formats of this resource. Use the headers property in the options object passed to fetch to set the header named Accept to the desired media type.
Finally, try asking for the media type application/ and see which status code that produces.
// Your code here.
Display hints...
Base your code on the fetch examples earlier in the chapter.
Asking for a bogus media type will return a response with code 406, “Not acceptable”, which is the code a server should return when it can’t fulfill the Accept header.
A JavaScript workbench
Build an interface that allows users to type and run pieces of JavaScript code.
Put a button next to a <textarea> field that, when pressed, uses the Function constructor we saw in Chapter 10 to wrap the text in a function and call it. Convert the return value of the function, or any error it raises, to a string and display it below the text field.
<textarea id="code">return "hi";</textarea>
<button id="button">Run</button>
<pre id="output"></pre>

<script>
  // Your code here.
</script>
Display hints...
Use document. or document. to get access to the elements defined in your HTML. An event handler for "click" or "mousedown" events on the button can get the value property of the text field and call Function on it.
Make sure you wrap both the call to Function and the call to its result in a try block so you can catch the exceptions it produces. In this case, we really don’t know what type of exception we are looking for, so catch everything.
The textContent property of the output element can be used to fill it with a string message. Or, if you want to keep the old content around, create a new text node using document. and append it to the element. Remember to add a newline character to the end so that not all output appears on a single line.
Conway’s Game of Life
Conway’s Game of Life is a simple simulation that creates artificial “life” on a grid, each cell of which is either alive or not. In each generation (turn), the following rules are applied:
-
Any live cell with fewer than two or more than three live neighbors dies.
-
Any live cell with two or three live neighbors lives on to the next generation.
-
Any dead cell with exactly three live neighbors becomes a live cell.
A neighbor is defined as any adjacent cell, including diagonally adjacent ones.
Note that these rules are applied to the whole grid at once, not one square at a time. That means the counting of neighbors is based on the situation at the start of the generation, and changes happening to neighbor cells during this generation should not influence the new state of a given cell.
Implement this game using whichever data structure you find appropriate. Use Math.random to populate the grid with a random pattern initially. Display it as a grid of checkbox fields, with a button next to it to advance to the next generation. When the user checks or unchecks the checkboxes, their changes should be included when computing the next generation.
<div id="grid"></div>
<button id="next">Next generation</button>

<script>
  // Your code here.
</script>
Display hints...
To solve the problem of having the changes conceptually happen at the same time, try to see the computation of a generation as a pure function, which takes one grid and produces a new grid that represents the next turn.
Representing the matrix can be done with a single array of width × height elements, storing values row by row, so, for example, the third element in the fifth row is (using zero-based indexing) stored at position 4 × width + 2. You can count live neighbors with two nested loops, looping over adjacent coordinates in both dimensions. Take care not to count cells outside of the field and to ignore the cell in the center, whose neighbors we are counting.
Ensuring that changes to checkboxes take effect on the next generation can be done in two ways. An event handler could notice these changes and update the current grid to reflect them, or you could generate a fresh grid from the values in the checkboxes before computing the next turn.
If you choose to go with event handlers, you might want to attach attributes that identify the position that each checkbox corresponds to so that it is easy to find out which cell to change.
To draw the grid of checkboxes, you can either use a <table> element (see Chapter 14) or simply put them all in the same element and put <br> (line break) elements between the rows.